Git Usage
Set Up
Create a Repository at Github
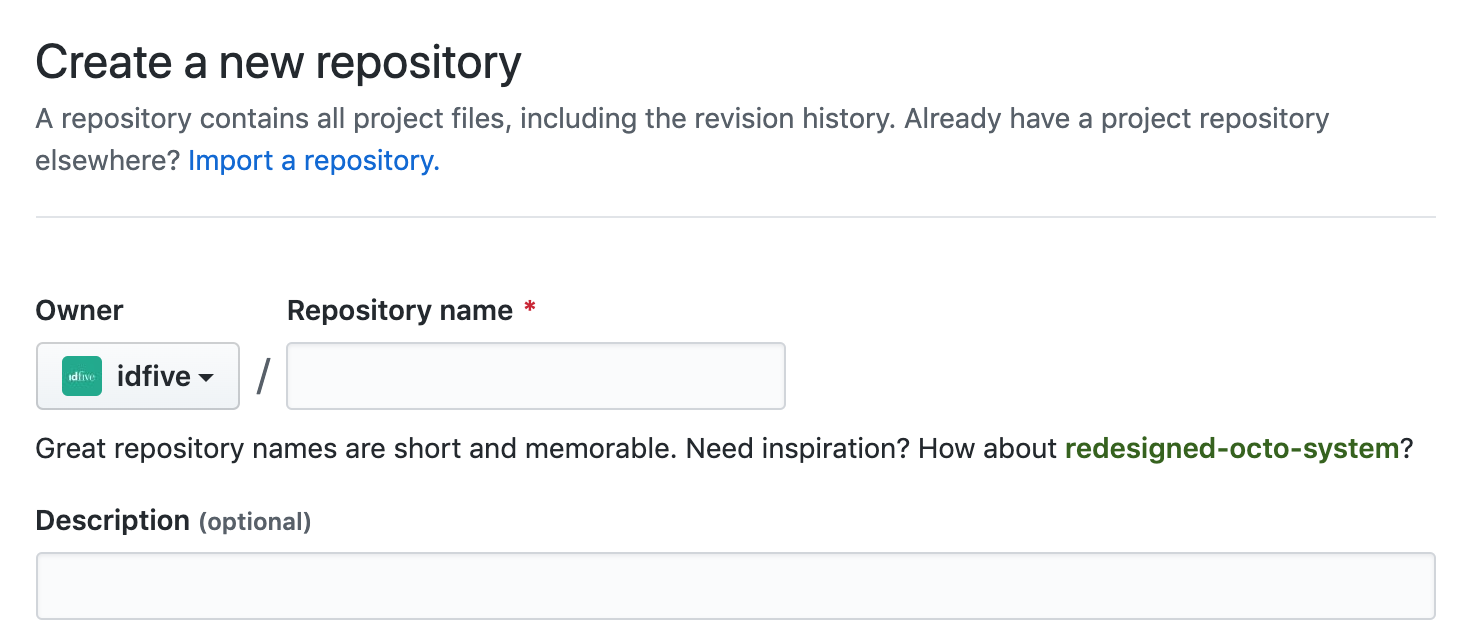
Screen for creating a new repository on Github.
Clone Repository Locally from the Command Line
git clone https://github.com/michaelscraven1972/learning learning1
This creates a directory called learning1 in the current directory.
Using Sourcetree
New > Clone from URL - enter URL and local directory location.

The dropdown gives a number of options, including to open existing local or remote repositories, or create new ones.
“Clone from URL” brings up a dialog where you can enter the URL of the repository.

Sourcetree will give default names and paths once it validates the repository
Fetch/Pull
If working collaboratively with other developers, the local repository will get behind. Git fetch gets the latest meta data from the remote repository so that the developer can see what changes have been made. Git pull, however pulls those changes and tries to integrate them with the local repository.
From the Command Line
git fetch

Git fetch outputs the changes that have been made on the remote
git pull

On pull, the files are updated
Sourcetree
If the local repository is behind, Sourcetree will show that a pull needs to be done.

The pull button shows that there are two commits to pull. The graph also shows that this repository is two behind.
When the user clicks the pull button, a dialog box comes up:
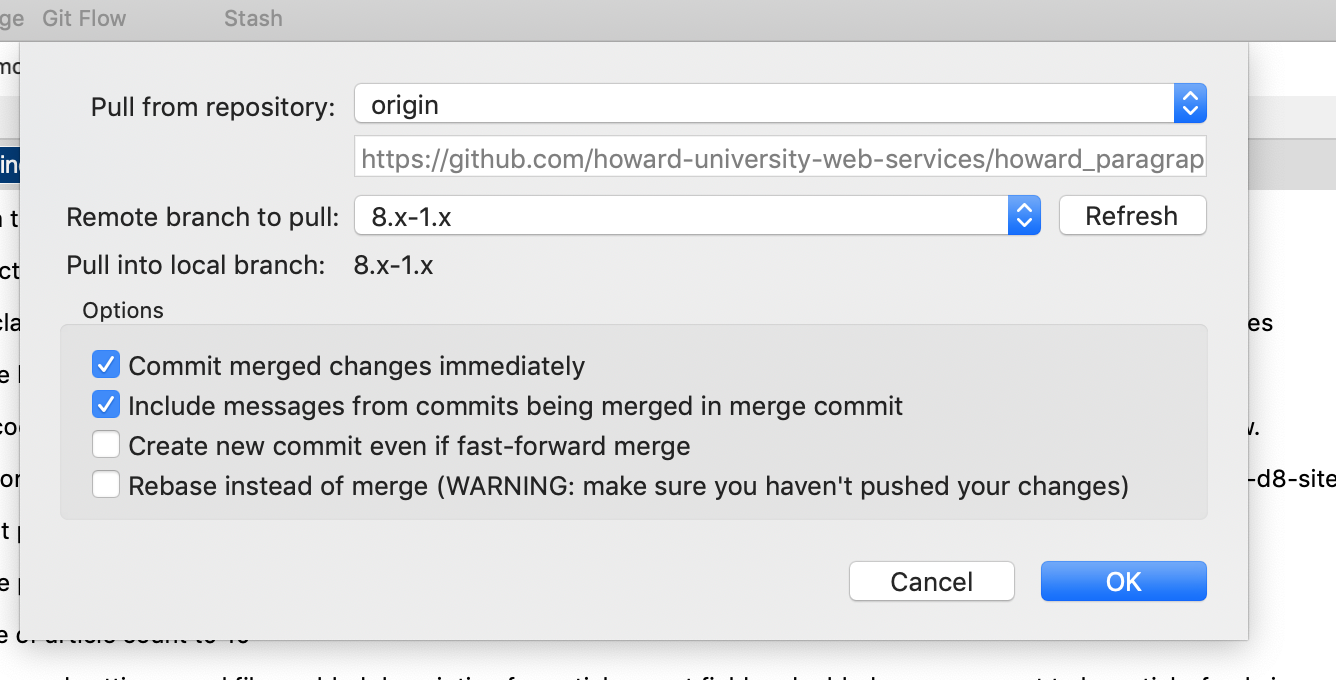
The dialog box allows selection of which branch and repository to pull from.
Add/Commit
Add/Commit From The Command Line
git status
Show tracked and untracked files and changes yet to be committed.

The status command shows that the file first.txt has been edited. Stage the file with add.
git add FILENAME
or, add all staged files:
git add .
Stage file and start tracking the file. Added files can then be committed.
git commit -m MESSAGE`
Will commit the added files with a message.
Add/Commit from Sourcetree
As files are changed in the local repository, Sourcetree records that files have changes that need to be staged and committed.
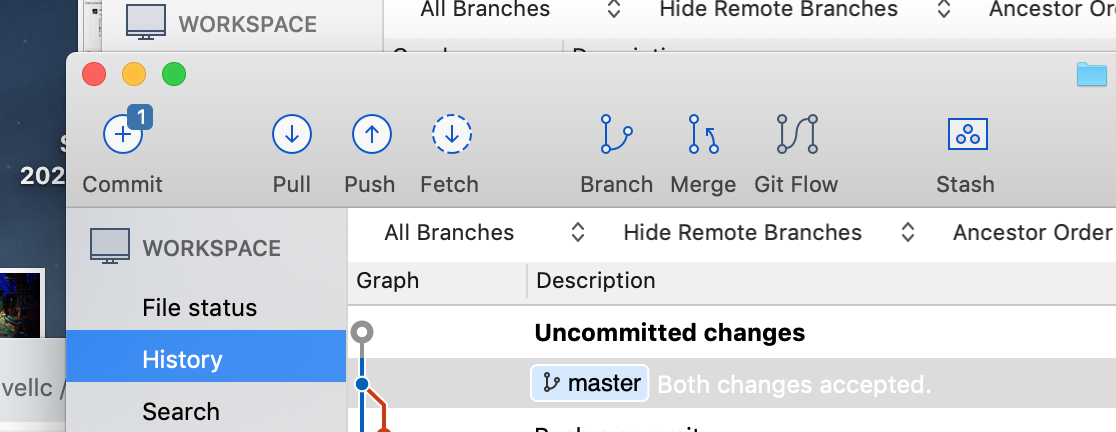
Both the graph and the commit button show that a file has changed and needs to be committed.
After clicking on commit, the changed files display on the left panel for review before being staged. Once, staged, the files still need to be committed.
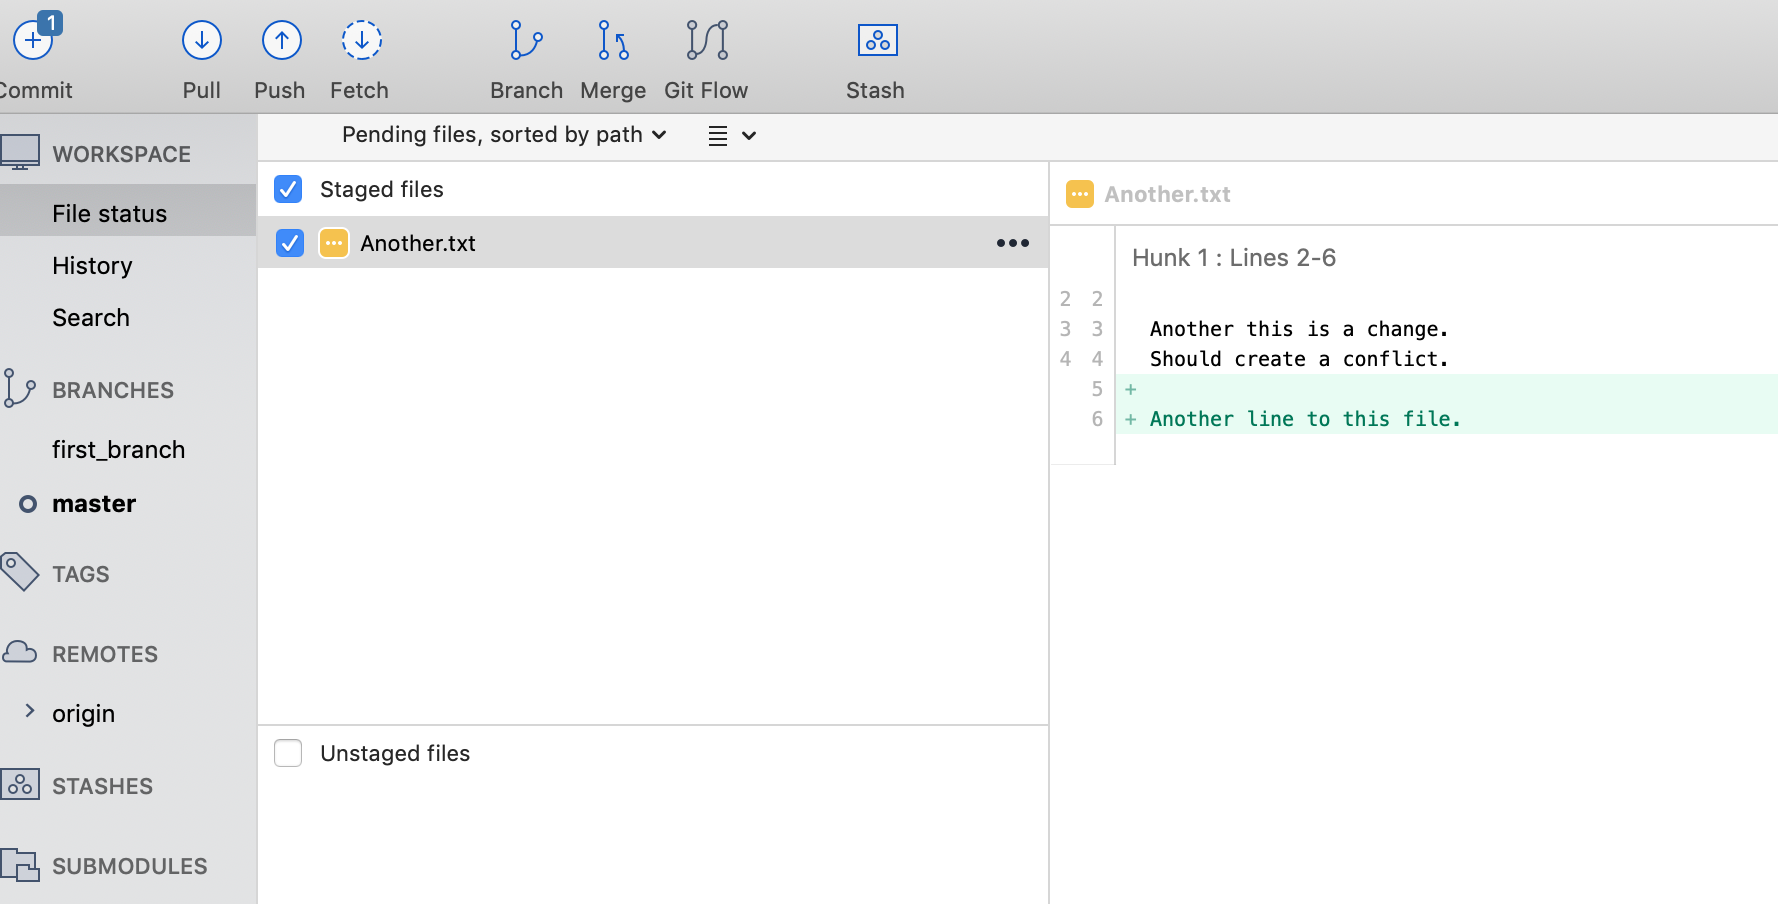
The staged and highlighted file in the left shows the changes in the right panel. Commit is not complete, though until a commit message and commit button clicked. Also, you can see we are on the master branch.
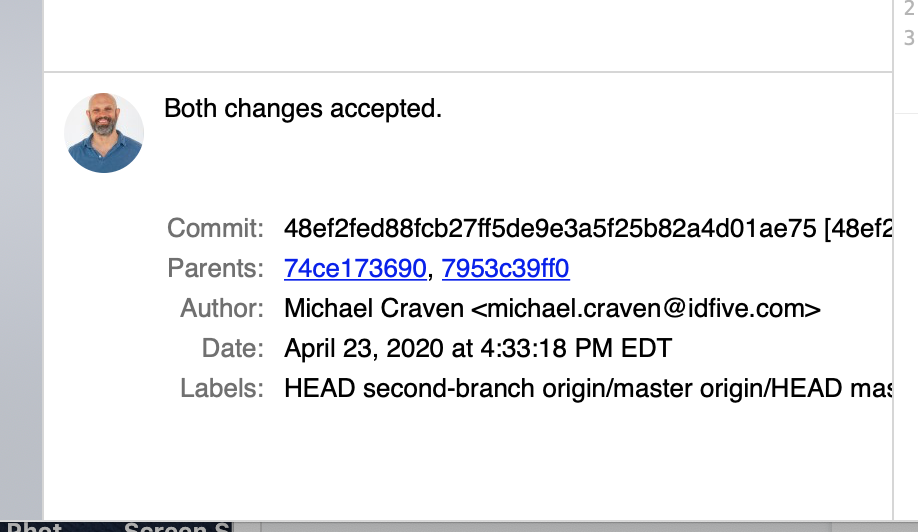
More information about any commit can be found by clicking anywhere along the graph. This includes the author of the commit, the commit hash, and the commit message.
Push
Push from the Command Line
The push command pushes changes to a branch to the remote repository.
git push REMOTE BRANCH
Push from Sourcetree
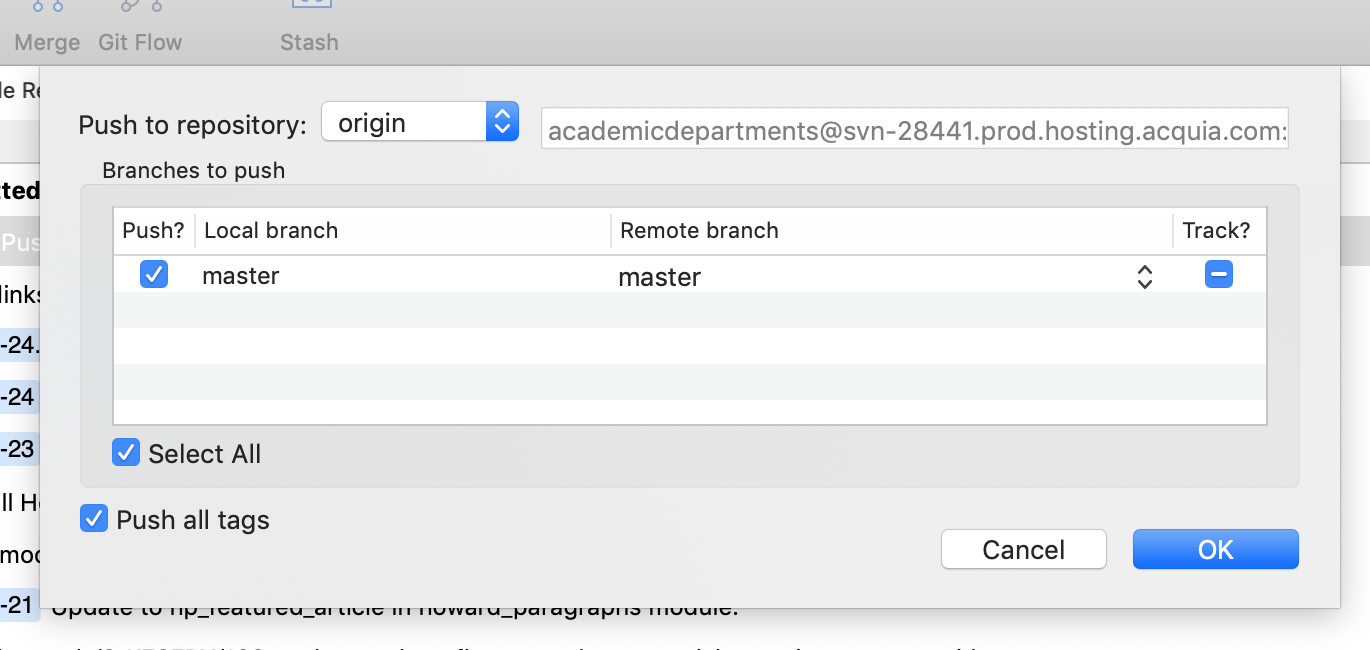
After files are committed, the push button will show a number like the commit button did. Pushing the button will generate a dialog box that asks which repository and which branch.
Unlike on the git command line, on push Sourcetree by default pushed tags:
Branching
Branching from the Command Line
git branch
Shows the branches available and which branch I am on.

Output from git branch, highlighting the branch the repository is on
git checkout -b first_branch
Creates and then checks out a new branch.
git checkout master
Brings me back to master.
git add .
Added files for commit.
git config credential.username "michaelscraven1972"
Change user for this repo.
Branching from Sourcetree
A new branch can be created by right clicking on the branch button on the left navigation.
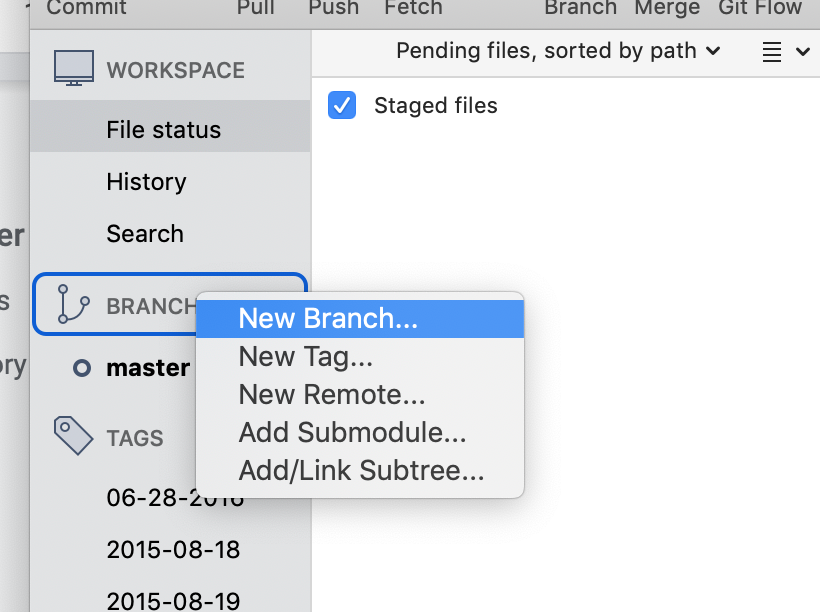
Selecting “New Branch” brings up a dialog box:
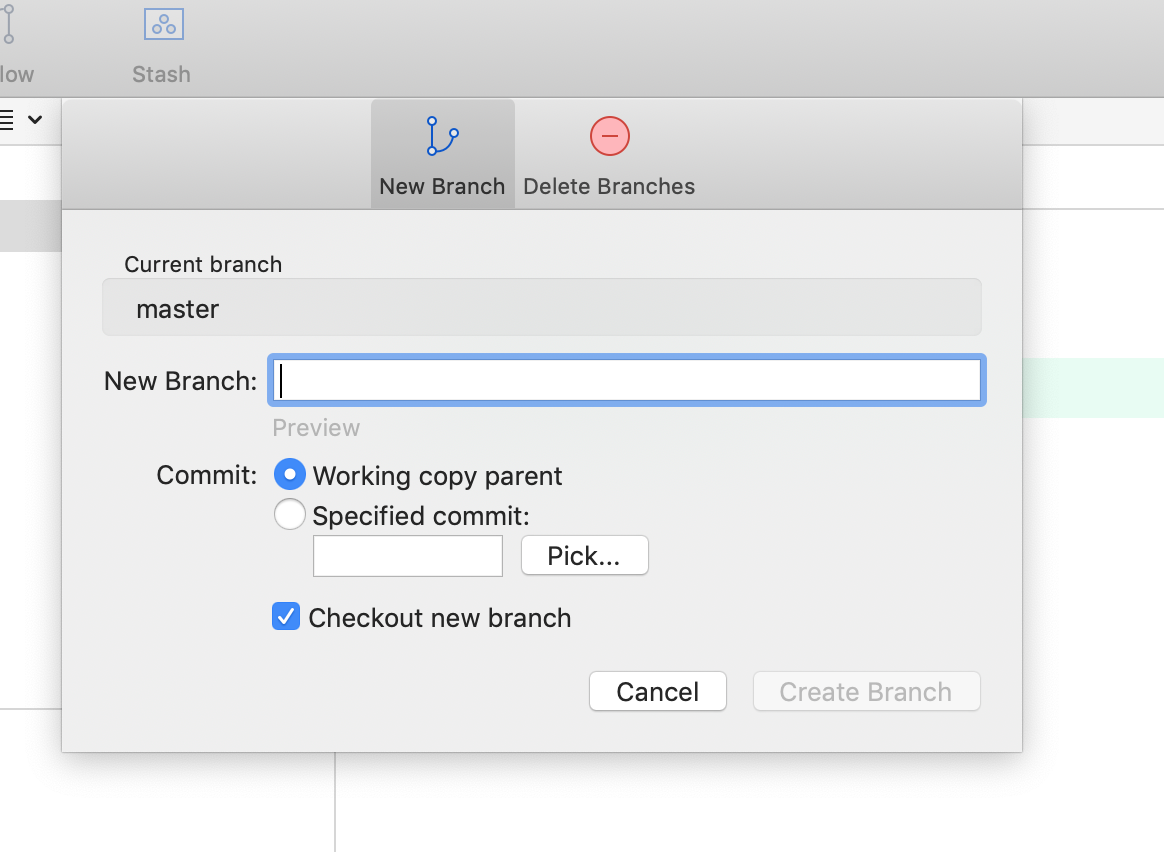
The dialog lets the user select whether to switch to the new branch and a specific commit to branch from.
Clicking on the new branch, the graph shows that the new branch is forking off main.

New branch appears on Fetch in Sourcetree
Sourcetree only shows local branches on the left, not remote. The top of the tree mode and the Remotes section on the left allows for show or hide remote branches.
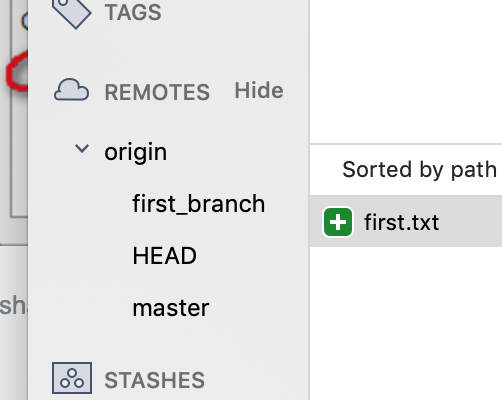
The remotes area.
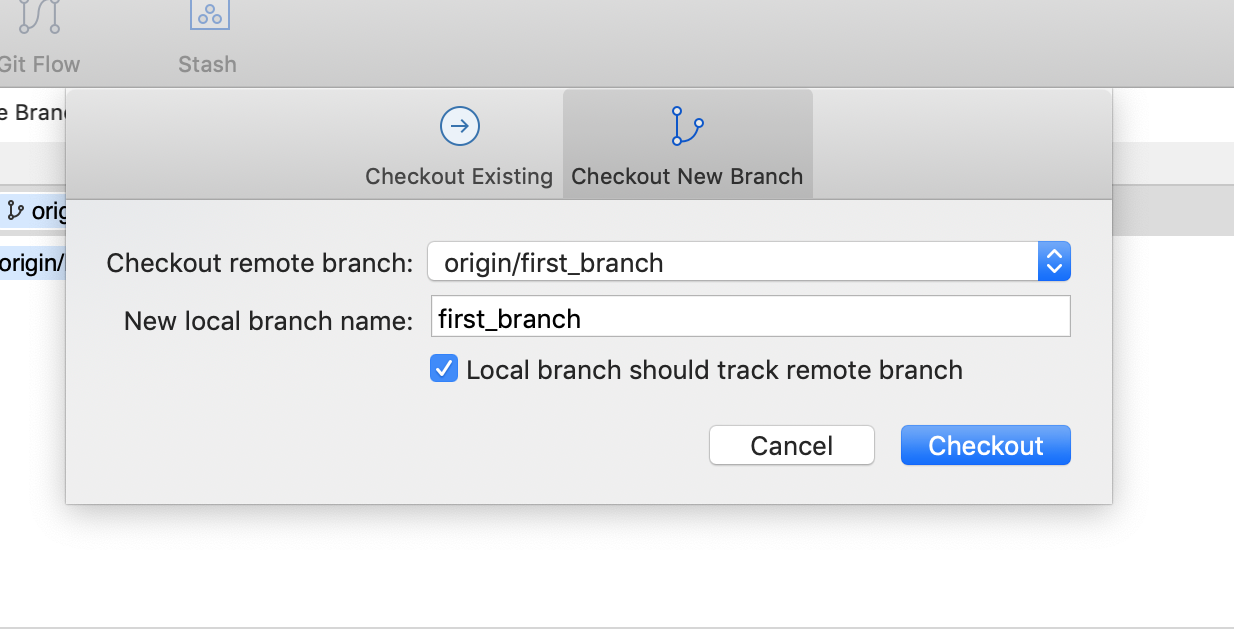
To create a local branch of the remote, right click on the remote branch and then checkout or double click the remote branch.
This brings up:
Merge Conflicts
File has been altered while it is being worked on locally. Pull the change locally, merge conflict. On the command line, will say (Merging) at prompt until changes are committed.
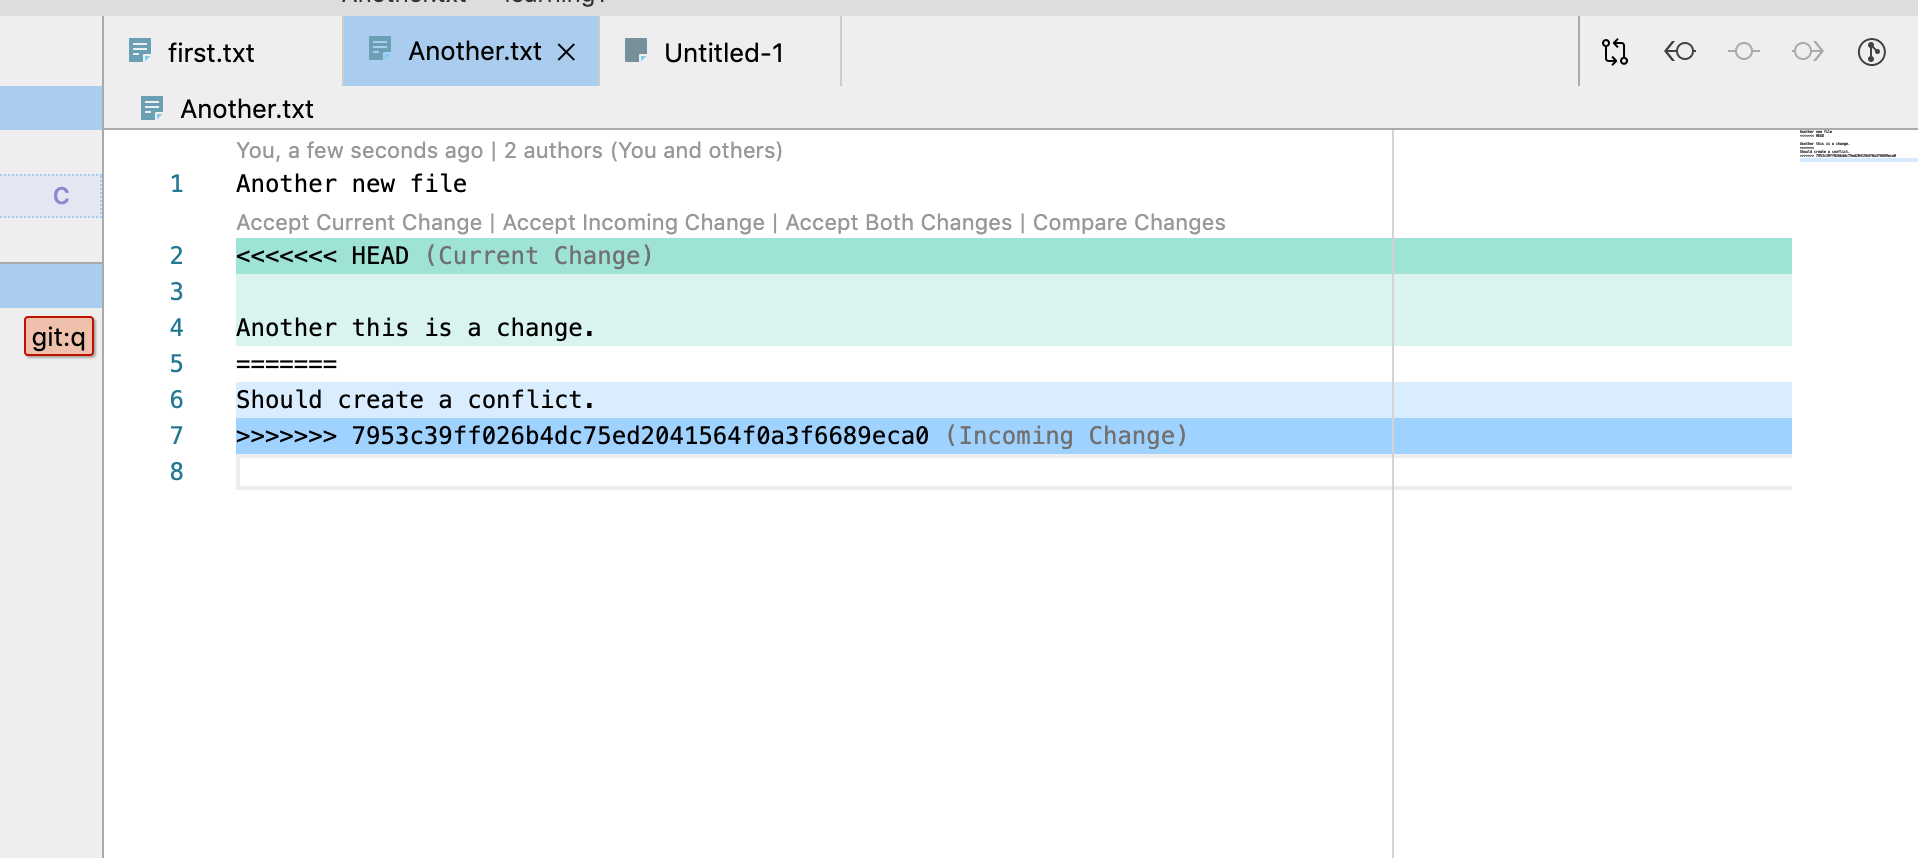
In VS Code, links for accept current (change that is going in from local), accept incoming, and accept both.
Often merge conflicts are more complicated than the screen capture above. Merge conflicts indicate that git cannot easily merge files and files will need to be manually reviewed, edited and committed.
Tagging
Tags are tied to commits. They allow a name to be given to a point in the repository. They are not by default pushed with a push from the command line.
Examples of how we use tags at idfive:
- A new tag pushed to a github repository that has been submitted to packagist kicks off a new release.
- A new tag is created to deploy to places like Aqcuia, in certain workflows.
Tagging from the Command Line
To push tags along with the branch, add --tags flag. Like this:
git push origin master --tags
Create a tag on the command line:
git tag -a <tag_name> -m "Tag message"
You can see all tags with:
git tag
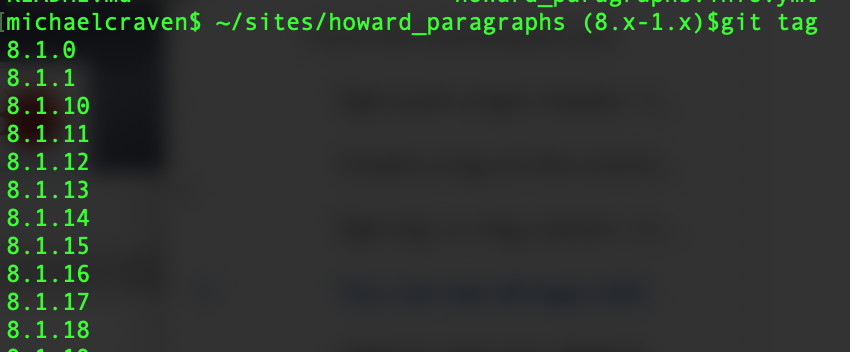
And you can see what commit a tag is connected to by typing:
git show TAG_NAME
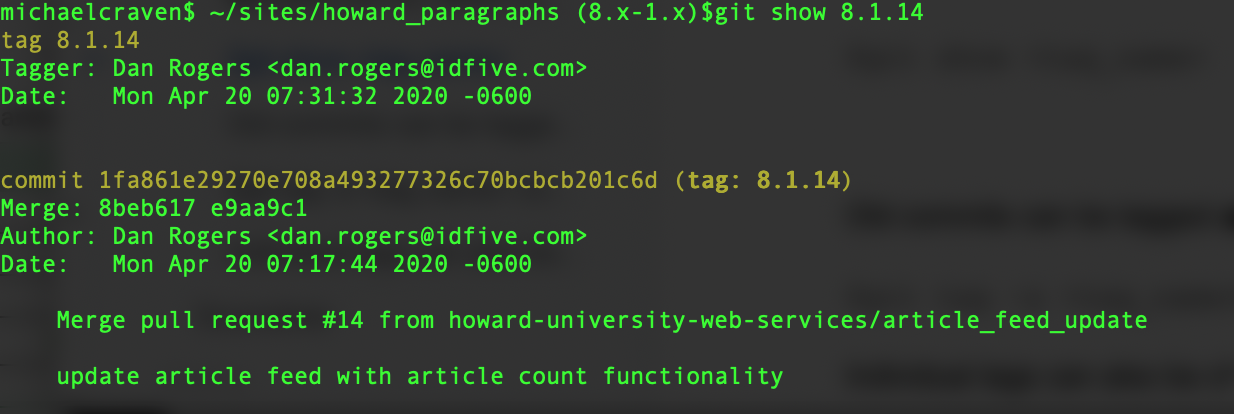
The tag 8.1.14 is connected to the commit beginning 1fa861e292
Old commits can be tagged after the fact with:
git tag -a TAG_NAME commit
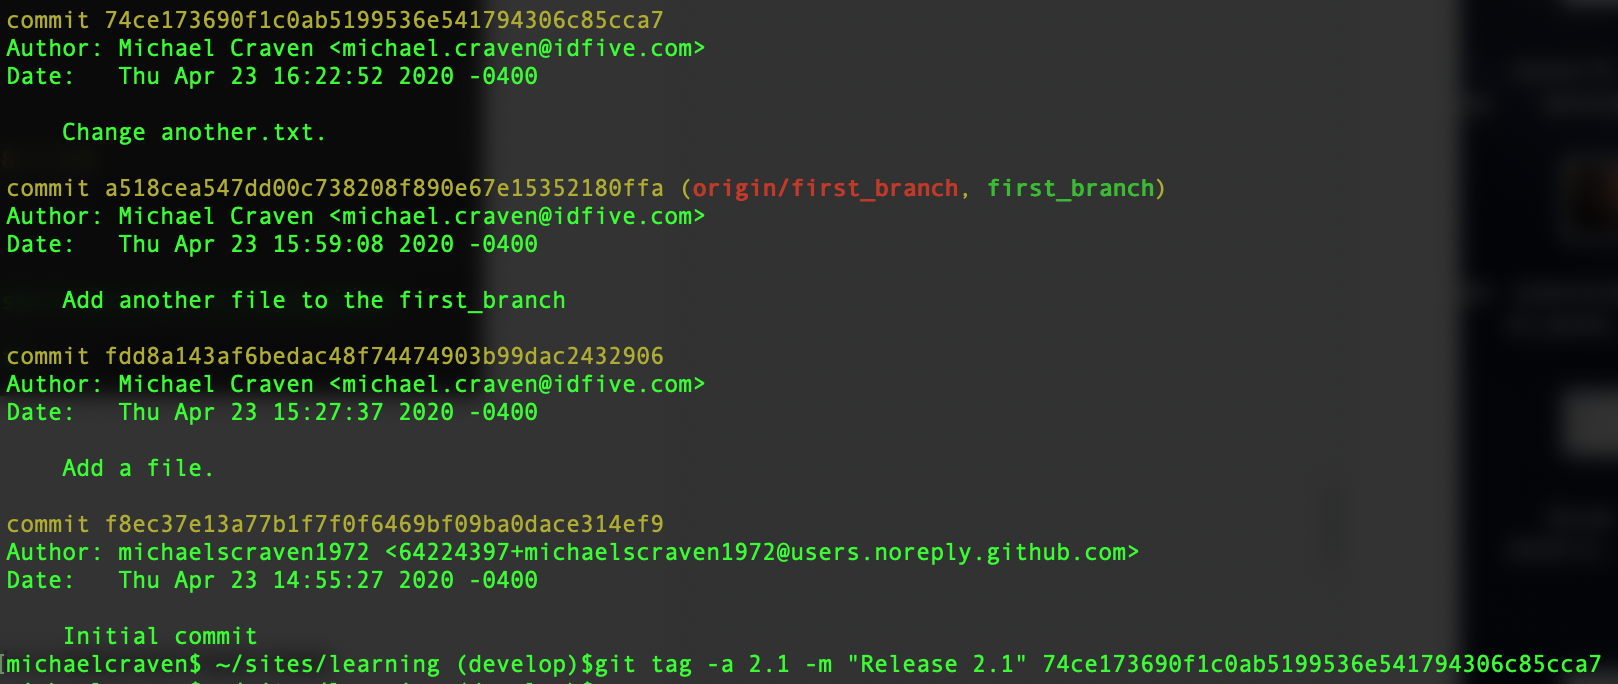
With the -m flag adding the message “Release 2.1” a past commit is tagged
Individual tags can also be checked out, but that puts you in a detached head state:
git checkout TAG_NAME
Tagging Using Sourcetree
In SourceTree, create a new tag by right clicking on “Tags” on the left. You can also see all tags by clicking on “Show” next to the tags button.
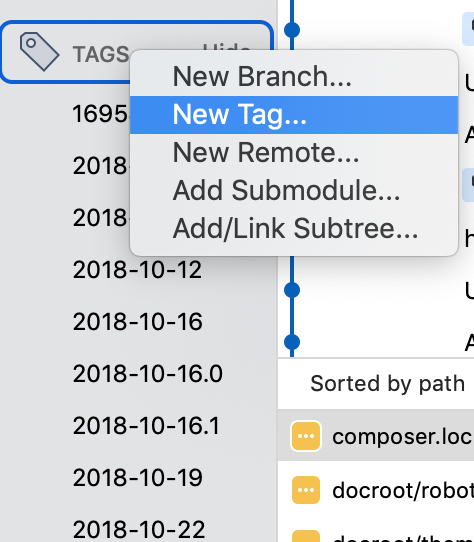
Adding a tag and the list of tags in the left panel.
Gitflow
https://www.atlassian.com/git/tutorials/comparing-workflows/gitflow-workflow
idfive uses the gitflow methodology for development. Gitflow defines a set of branches and specific purposes for each kind of branch. In addition to the master branch, gitflow uses a develop branch, feature branches, release branches, and hotfix branches.
- develop: which is the starting branch for all feature branches. Develop can be very dynamic, with new feature code being merged in all the time.
- feature: feature branches are created to work on new functionality.They are merged back to develop when complete.
- master: is very stable, is always production ready. No feature branches are made from master.
- release: a branch created from develop when a new set of features is ready to be merged into master
- hotfixes: created from master to repair bugs found in the production code after a release.
Set Up
Set Up from the Command Line
Install gitflow on the command line with:
brew install git-flow
After installation, to begin gitflow for a project from the command line:
git flow init
Git flow will ask questions for setting up the branches.
Set Up from Sourcetree
Sourcetree has a button for setting up gitflow:
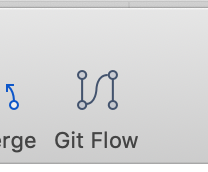
The default set up in Sourcetree will set up the different branch types in their own directories:
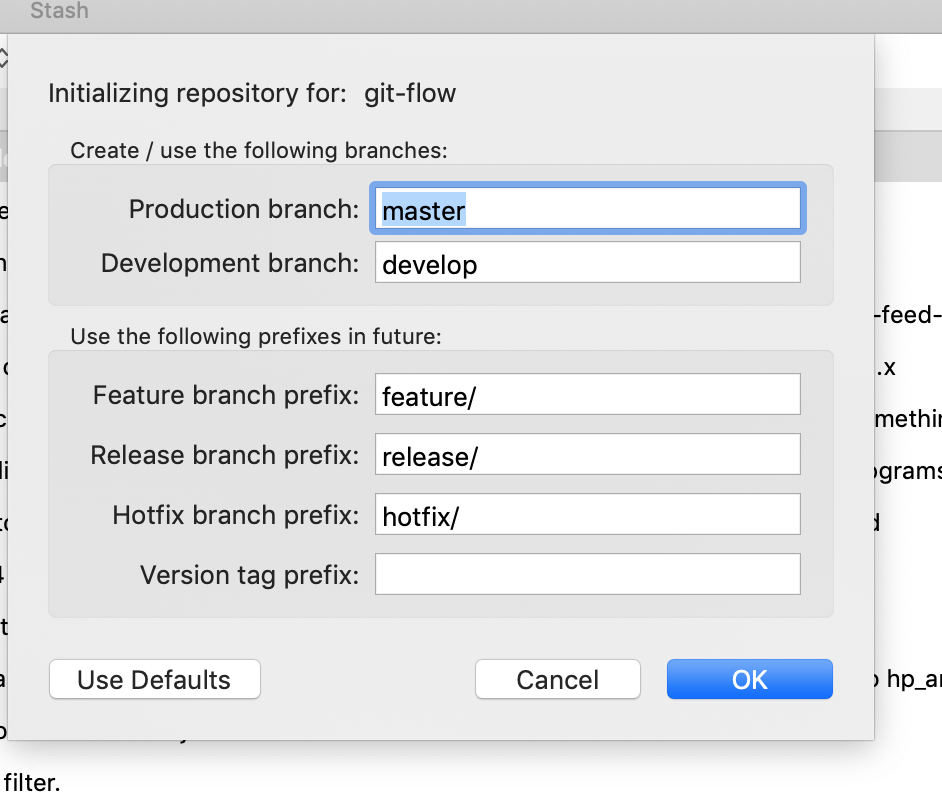
As stated here: https://developers.idfive.com/#/general/git/standards, this setup will not work with Pantheon multidev. Thus, usually this is changed to prefixes, “f-”, “r-”, and “h-”. In Sourcetree, the config file will have to be edited to reflect the changes made in the GUI. After this, branch names will have the prefix and will not need to be added. As the developer documents note, changing these prefixes sometimes does not actually work (bug in Sourcetree potentially), and that the config file for Sourcetree needs to be edited:
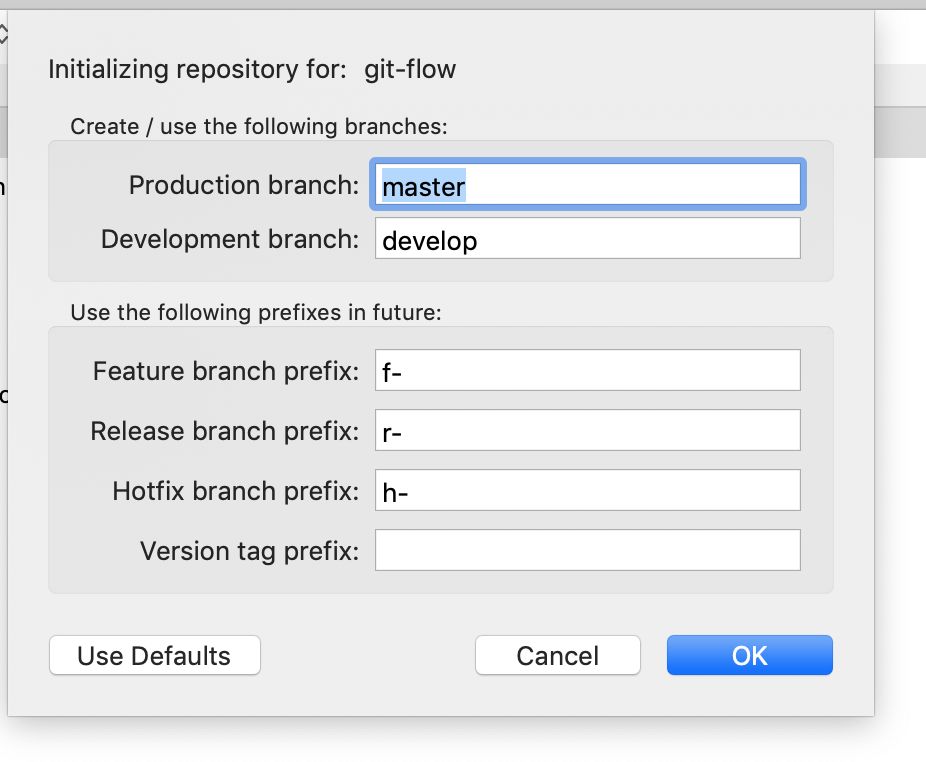 Changing prefixes.
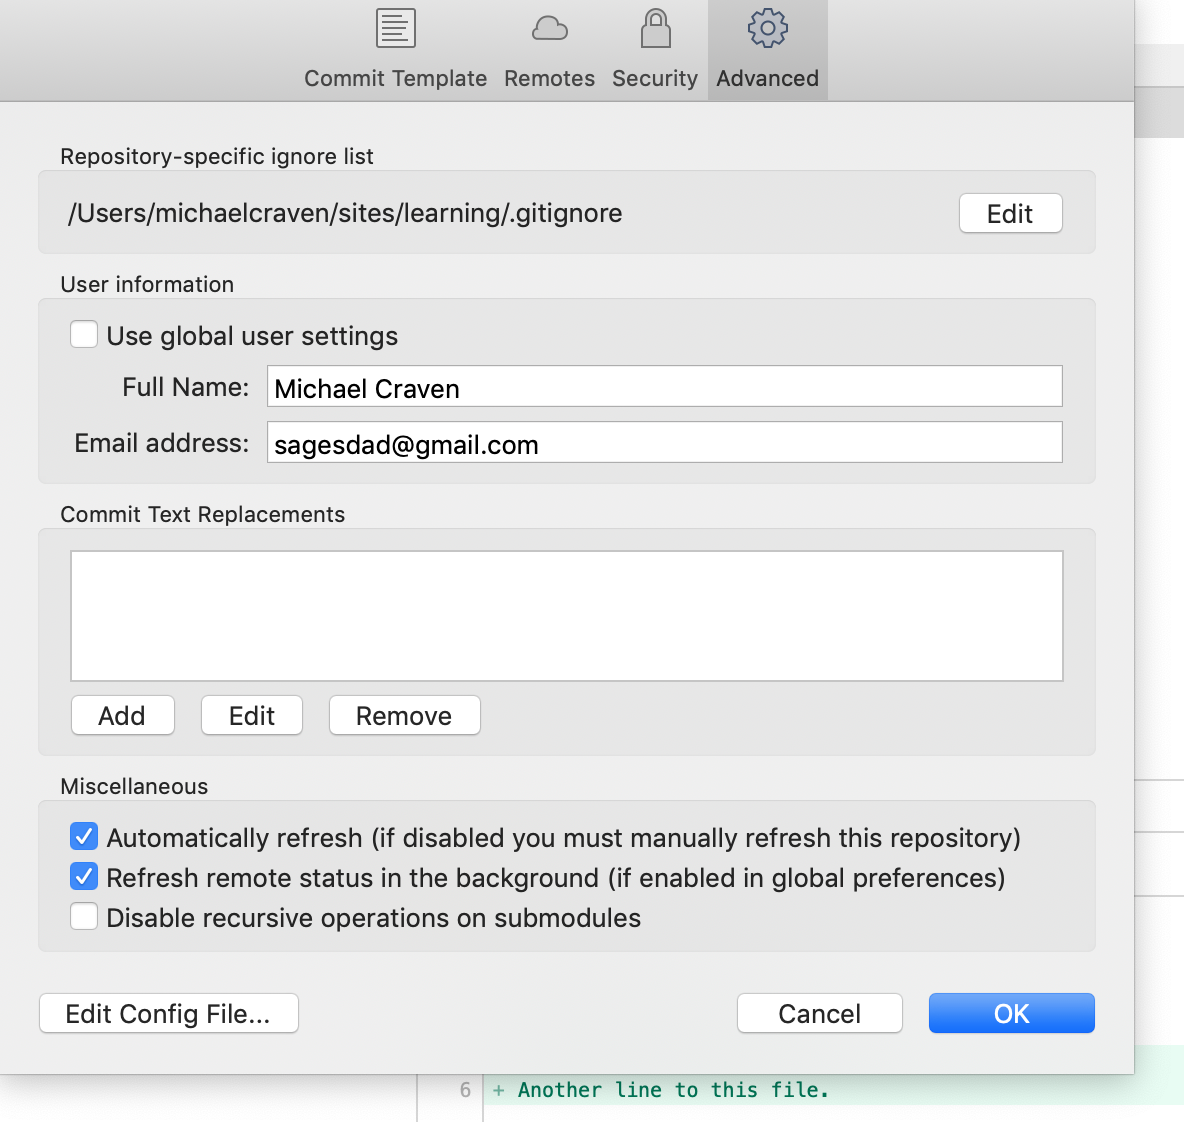
The edt config file button is on the advanced tab for the settings.
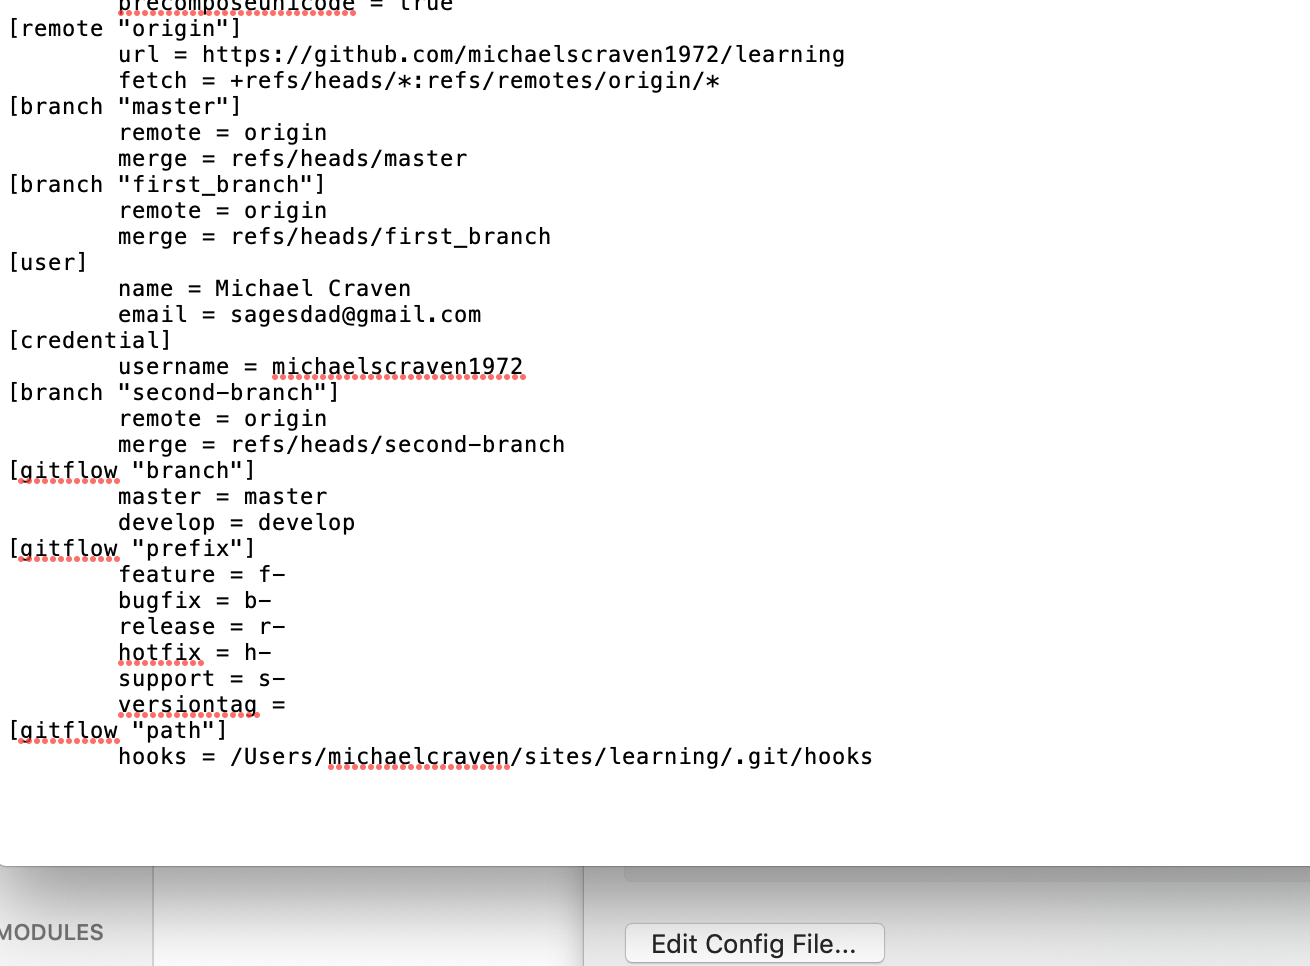
The edit config file
Using Gitflow
Using Gitflow from the Command Line
With git flow installed, a new feature branch is created with the following:
git flow feature start BRANCH_NAME
When the feature is complete, the feature branch is merged with develop and the feature branch deleted. The command:
git flow feature finish BRANCH_NAME
Merges the features branch into develop and deletes the feature branch.
Likewise, hotfix and release branches can be created. Both hot fix and release branches are normally merged back into both master and develop when they are finished.
Using Gitflow from Sourcetree
Once Gitflow is set up, clicking on the Gitflow button again gives the option to set up a feature. Give the feature branch a name. The repo will switch to the new branch.
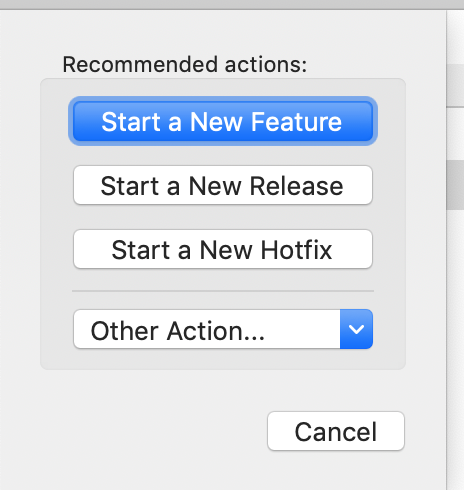
The Gitflow dialog for starting a new branch
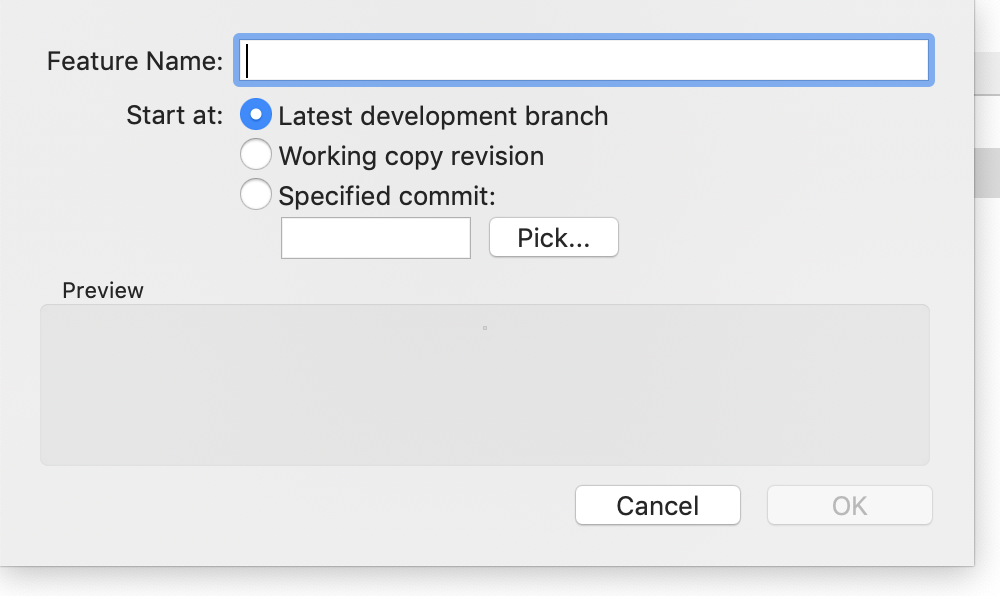
Name the feature on the next dialog
Once complete with the feature, highlighting the branch and then clicking Gitflow provides the option to finish the feature:
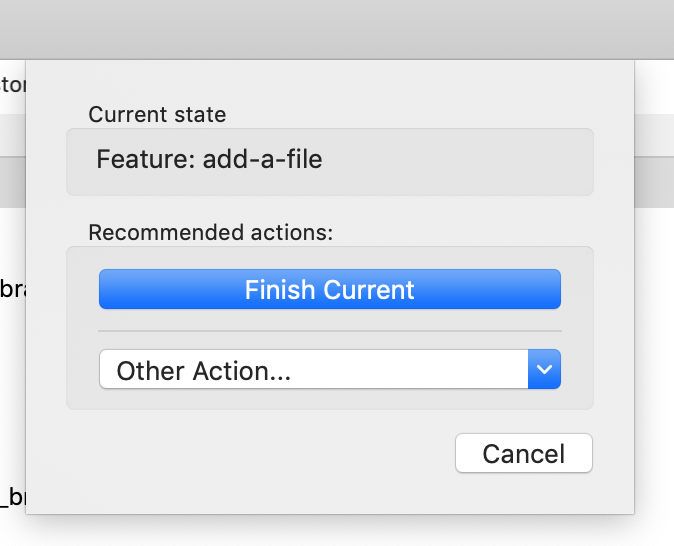
Clicking on Finish Current gives the option to save or delete the feature branch as the feature is merged into develop.
Commit Messaging
When to Commit
Jason McCreary outlines a simple set of two rules for when to commit.
- Commit when there is a complete unit of work
- Commit anything that you may want to roll back
The second rule is sort of a special case. The first is interpretive.
What is not a good idea, is committing based on anything as arbitrary as time. Rather all changes in one commit should be related to one relatively small unit of work. Being mindful of the second rule and the fact that often commits need to be rolled back, it is good to lean on committing frequently.
What Should be in a Commit Message
Commit messages and how they should be formatted connect with commits themselves in that commits messages, so they can be easily understood, should be short and direct. Conversely, commits, so they can be easily rolled back and reviewed, should be of a small, single unit of related changes, which helps in writing succinct commit messages. So, if it takes too long to meaningfully outline the changes in a commit, it should probably be broken up.
Some general commit message tips (credit to Tim Pope for inspiration):
- Capitalized, short (50 chars or less) summary
- More detailed explanatory text, if necessary. Wrap it to about 72characters or so. In some contexts, the first line is treated as the subject of an email and the rest of the text as the body. The blank line separating the summary from the body is critical (unless you omit the body entirely); tools like rebase can get confused if you run the two together.
- If bugify/trello ticket for this exists, add a reference(s) to them at the bottom,like so: Resolves: #123
Reviewing Commit Histories
The basic command for reviewing recent commits is:
git log
Adding the --graph flag gives a visual representation of the commit history:
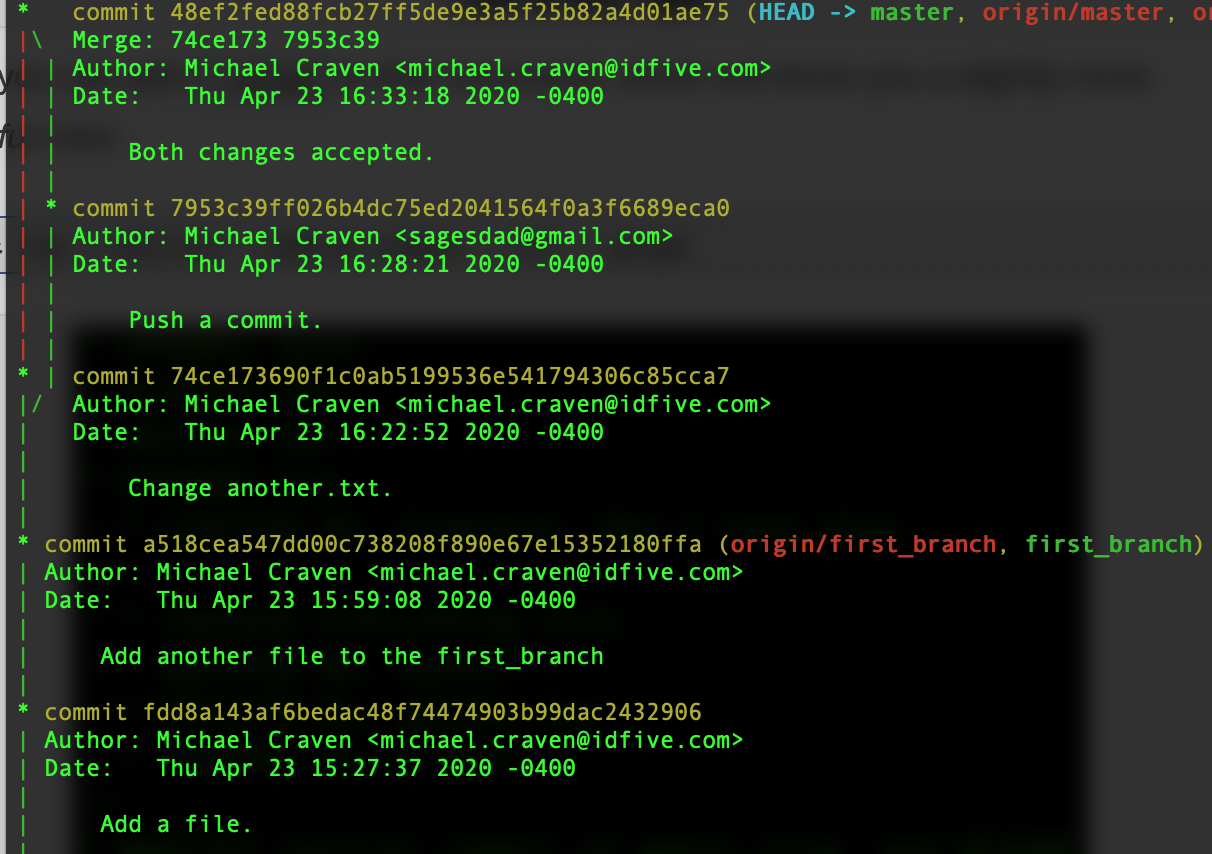
Git log with the graph flag.
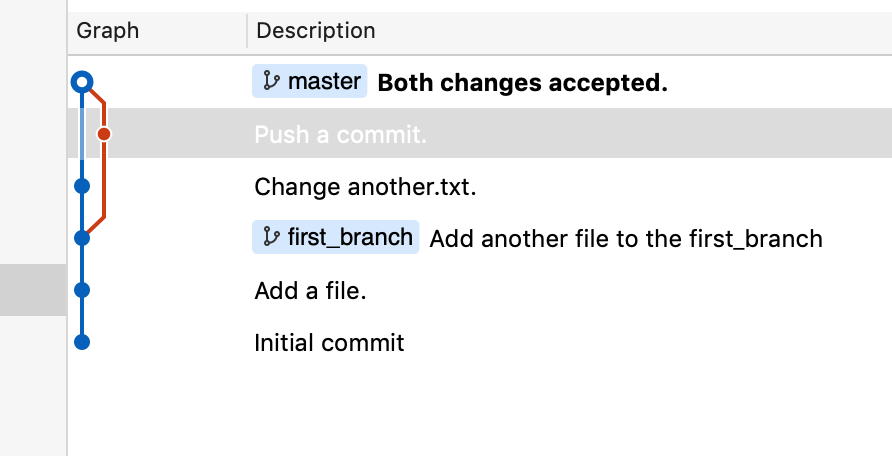
The graph represented above shows where the first_brach flag (in red) forks off of the master branch and is then merged later at commit 48eff2fed88f.
The same information is displayed in Sourcetree like this:
Getting History for an Individual File
History from Command Line
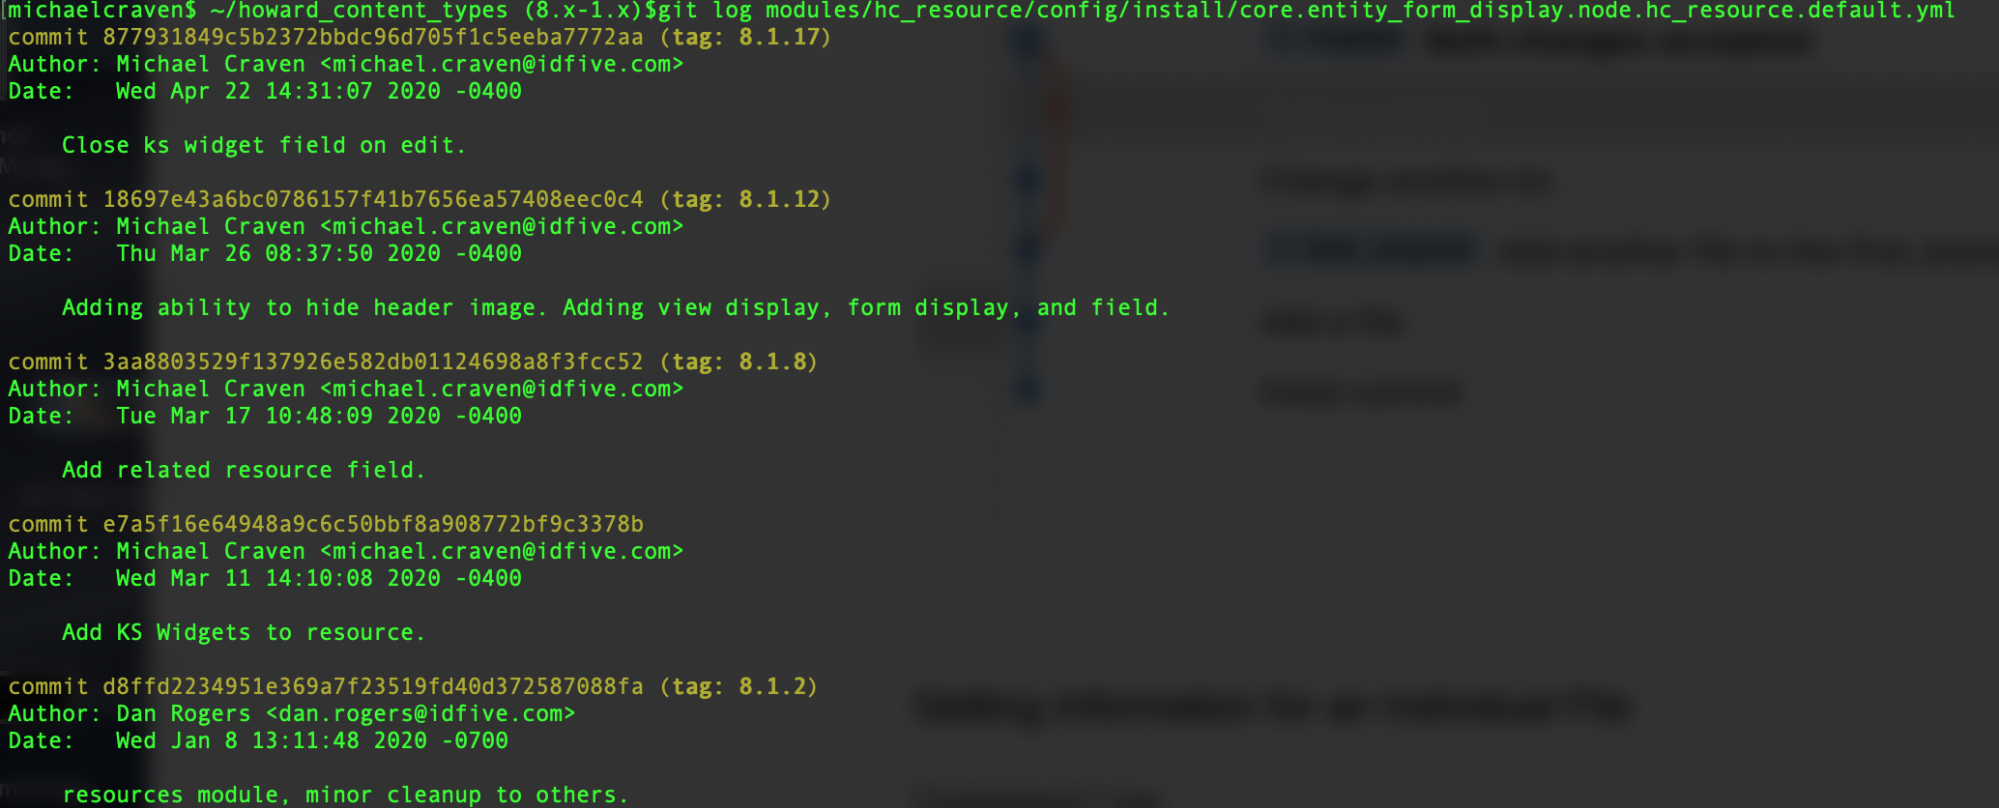
The git log command also allows displaying the information for a single file. Without any flags, git log shows an abbreviated output like the git log command, only showing commits that affect the named file.
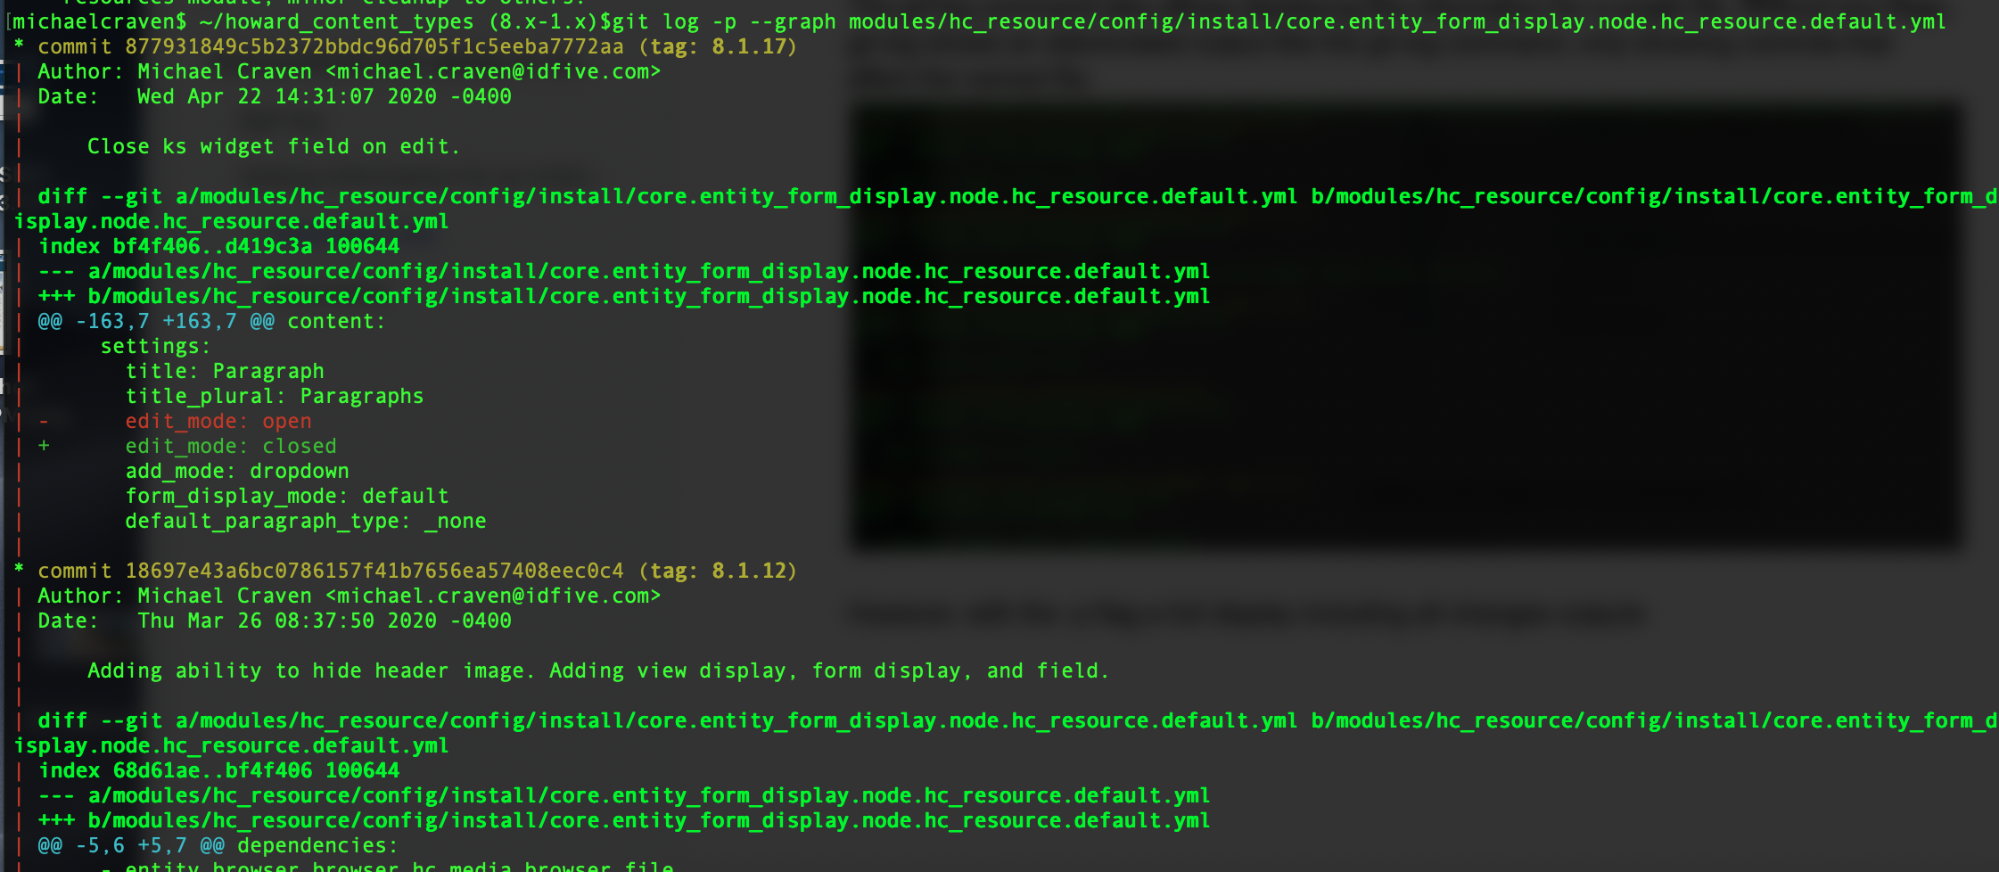
However, with the -p flag a full display including all changes outputs
git log -p FILE_NAME
History from Sourcetree
In Sourcetree, get the commit history for an individual file by clicking on a commit, right clicking on one of the files and going to log selected.
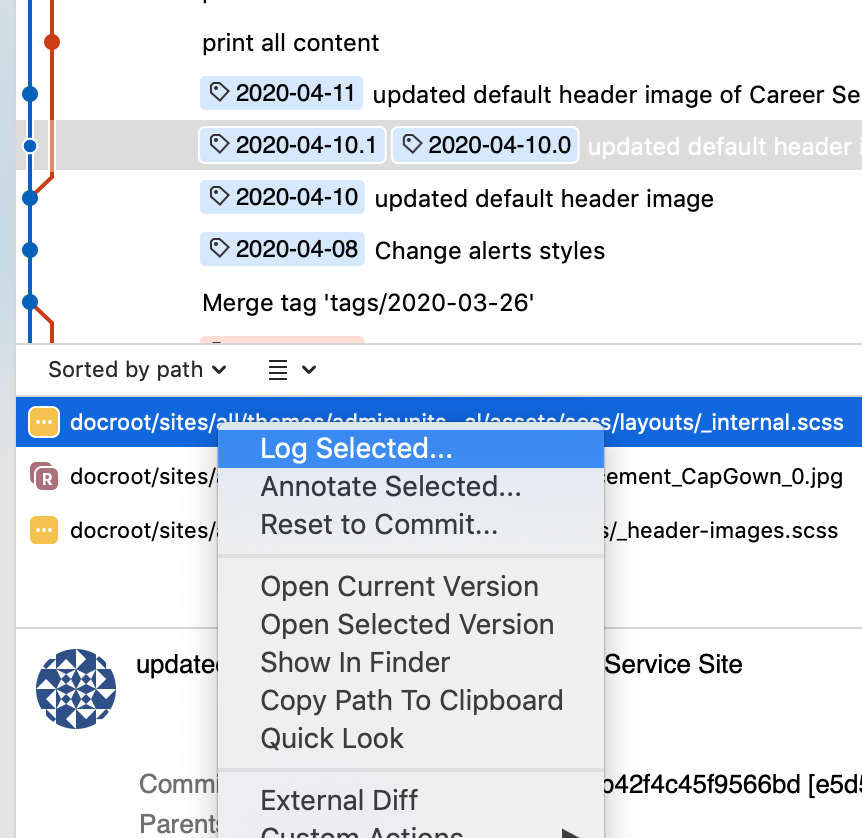
Here, right clicking on a file from a highlighted commit shows the Log Selected … option
From there, it is possible to each commit where the file changed and what changes were made:
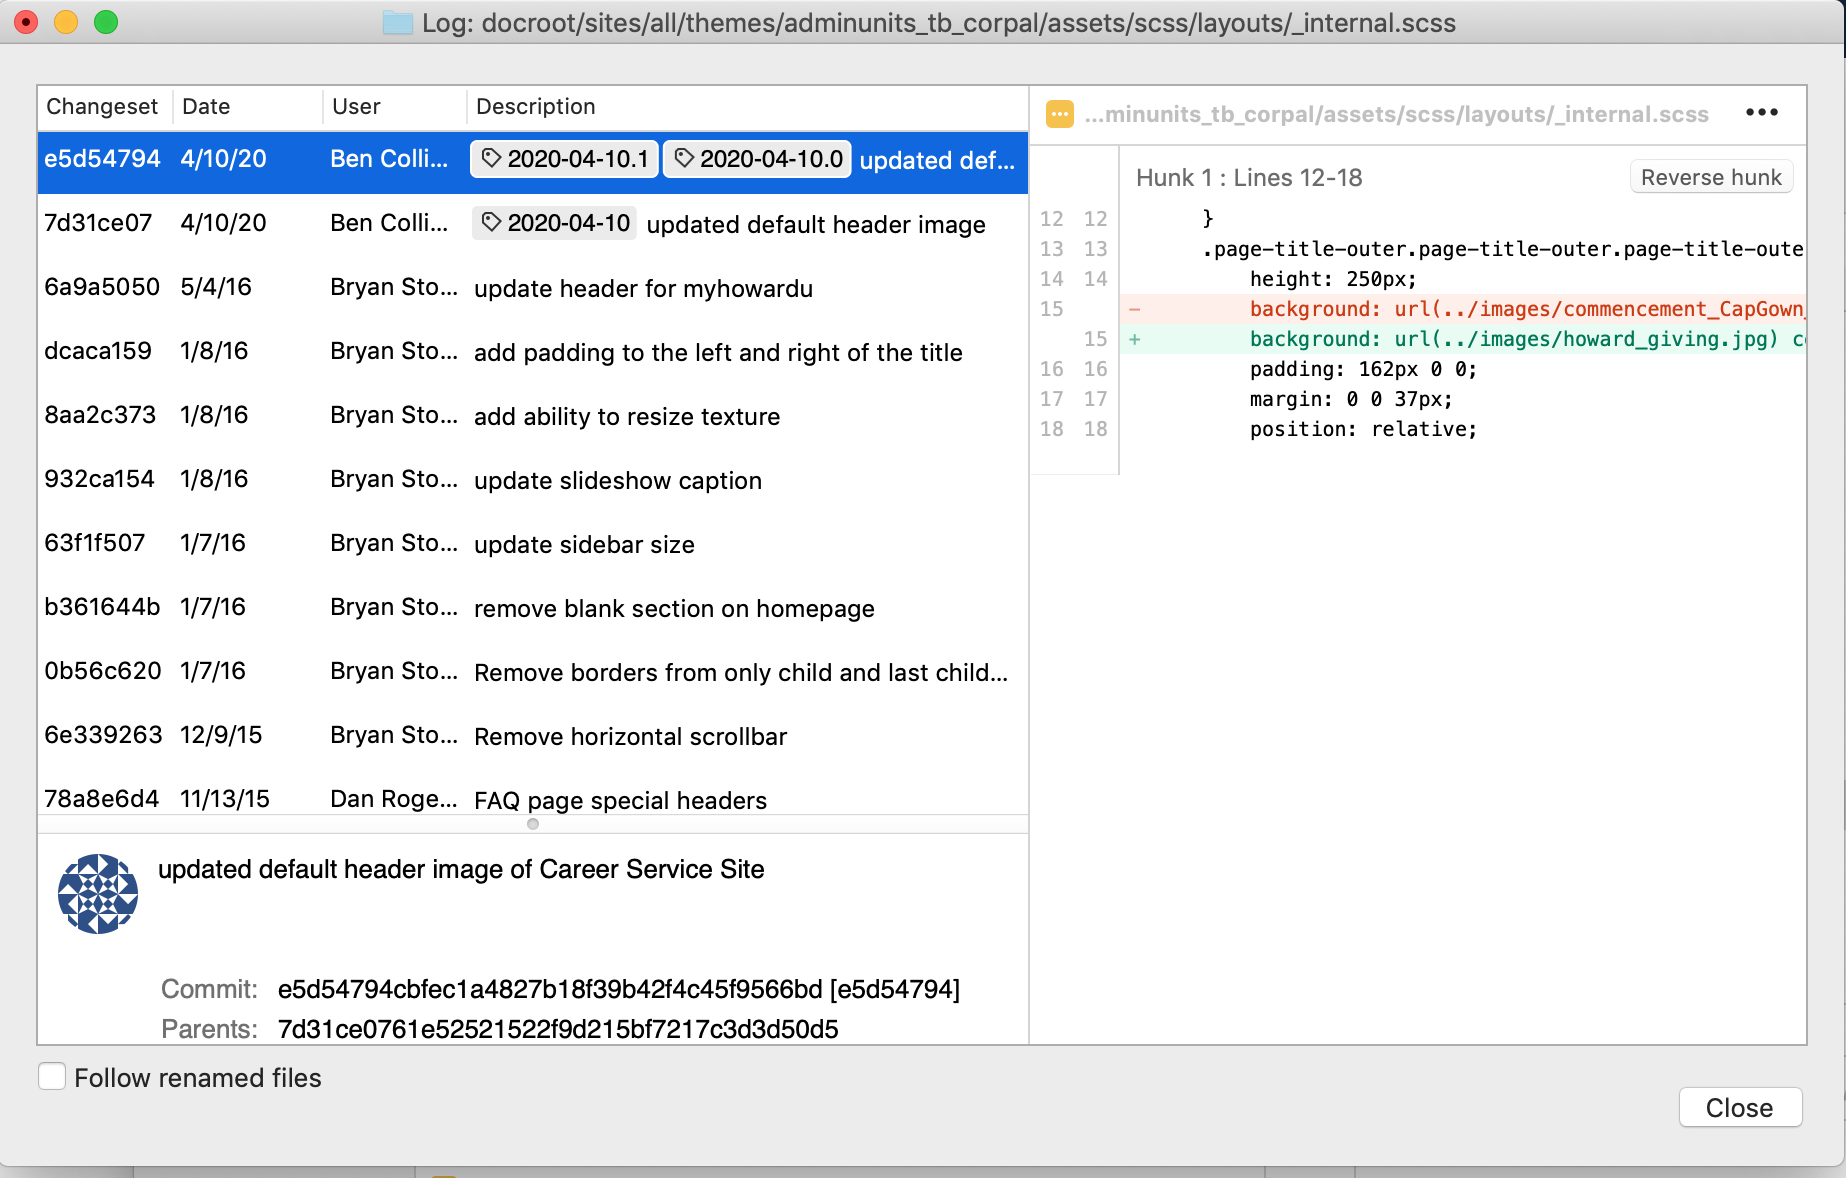
The right panel shows how the file changed in this commit
History from VSCode
The new (as of version 1.44) Timeline feature in VSCode allows you to review file histories as well. Simply highlight a file and open the Timeline panel on the left.
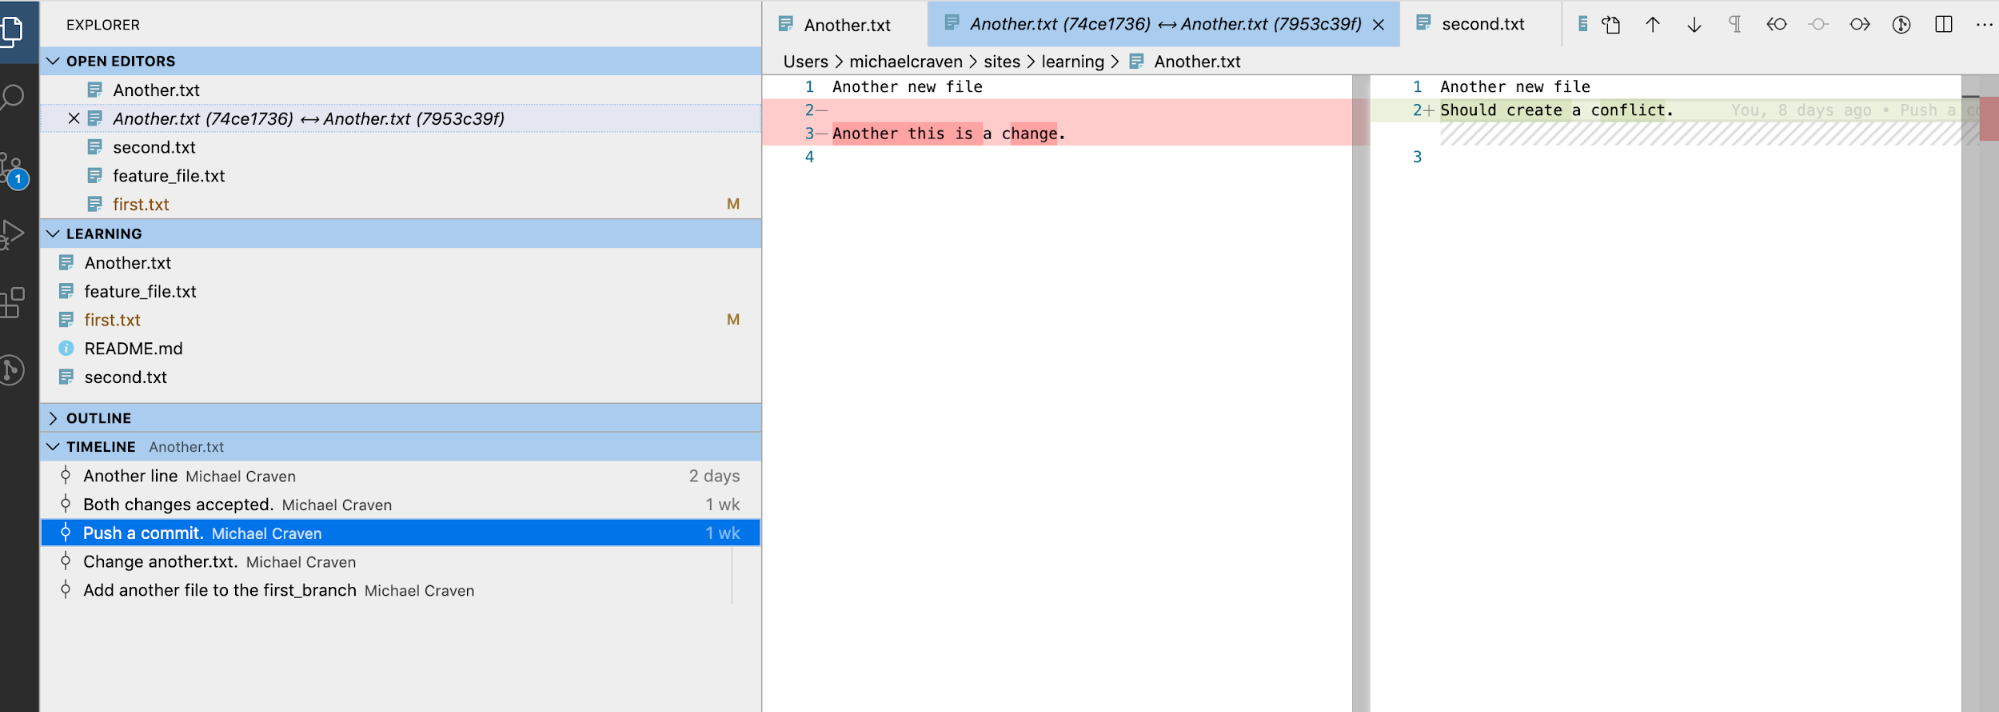
VSCode with timeline open and commit highlighted (light high contrast color theme)
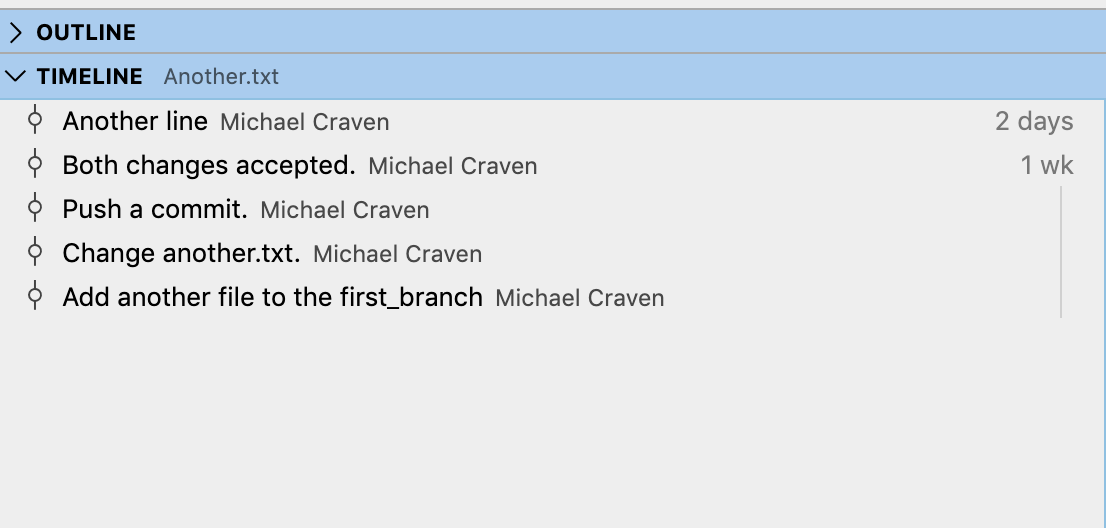
Close up of the timeline in the left panel
Changes to the file are in the right panel.

Changes made to the file in the commit. Green highlighting indicates new lines.